Fluent SMTP – Sending emails from WordPress and your host is not so easy. Most of the time, they fail to send the emails and usually your emails don’t leave the site. However in some cases even if the messages are sent, the messages are not delivered in the inbox.
The above mentioned problems are easily solved by one plugin which is also free: Fluent SMTP
Table of Contents
Introduction to Fluent SMTP
Fluent SMTP is a definitive WP Mail Plugin which interfaces your Email Service Provider and it guarantees that your messages are delivered effectively.
Fluent SMTP ensures that WordPress emails are delivered safely and quickly, and that they reach your inbox.
Fluent SMTP associates WordPress mail with the client’s Email Service Provider.
Available Email Service Providers:
- Amazon SES
- SendGrid
- MailGun
- Sendinblue
- Pepipost
- Sparkpost
- Gmail OAuth API connection
- Google Workspace OAuth API connection
- Gmail via SMTP
- Zoho via SMTP
- Outlook OAuth API connection
- All other SMTP
- More native integrations that will come soon
Fluent SMTP features:
Right now Fluent SMTP is the fastest and most advanced WordPress Mail SMTP plugin.
- Speed
- Reliable
- Scalable
- Real time email delivery
- Email routing to multiple email connections
- Connect with any Email Service Provider
- Email logs
- Resend any email
- In details reporting
- Super fast UI powered by VueJS
Best thing about Fluent SMTP is that it is free and it will be free for the unforeseeable future.
Setup Fluent SMTP:
Following are the steps for the setup
- Install Fluent SMTP
- Click on Fluent SMTP admin
- Click on settings
- Click on Fluent SMTP
- Add a connection and choose your provider
- Fill in the settings
- Save and send a test email using the “Email Test” tab
Tutorial
Log in to your WordPress admin dashboard to set up FluentSMTP. From the left menu, select Plugins -> Add New Plugin.

Type Fluent SMTP into the search bar of the plugin section to get results and install the Fluent SMTP plugin. When you search, the first result you see is the required plugin. To install it, click on the install button.

Once the plugin is installed now activate this plugin.

Once activated the message to configure the plugin can be found on the top bar.

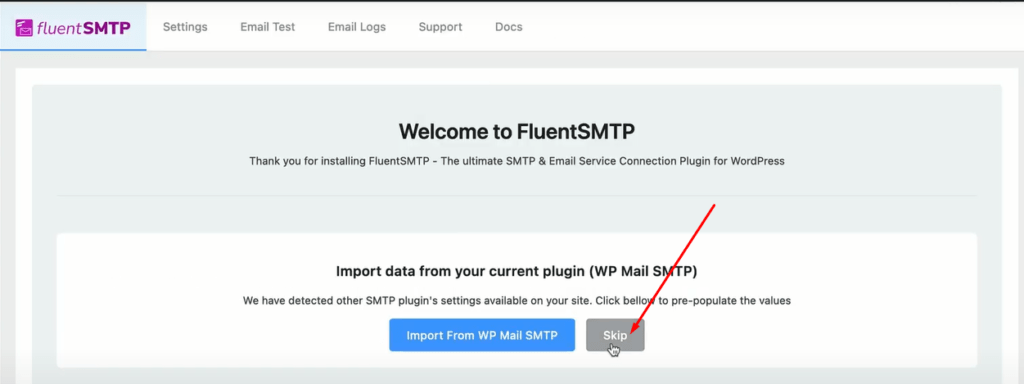
Click Configure FluentSMTP to set up FluentSMTP and use the plugin for email services. You can skip the first step.
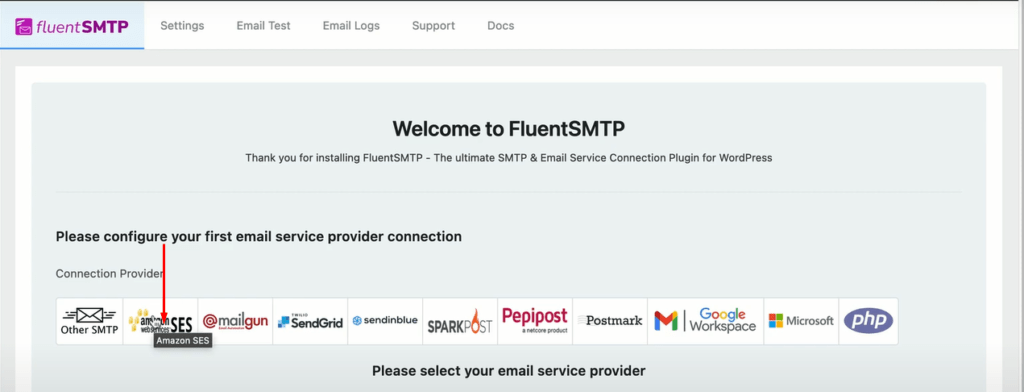
You can see all the email services available to integrate with.
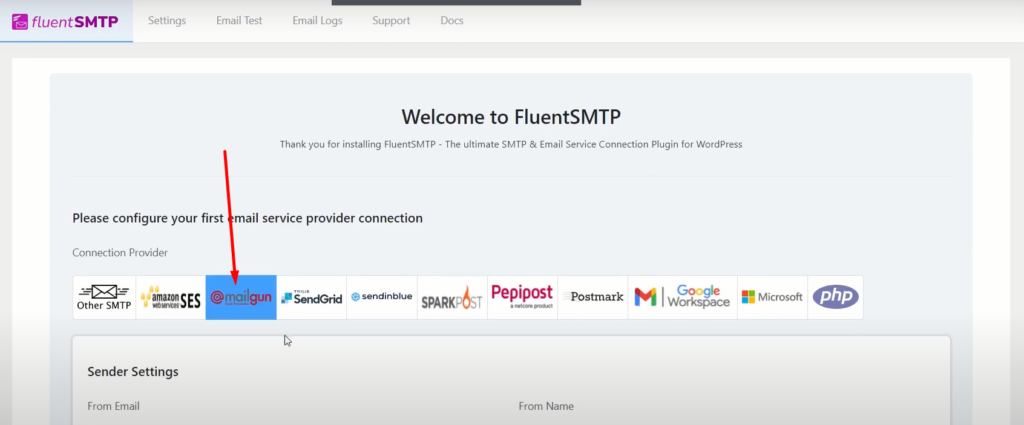
We are going with Mailgun so let’s click on MailGun from the above options.
Provide all information in the boxes.
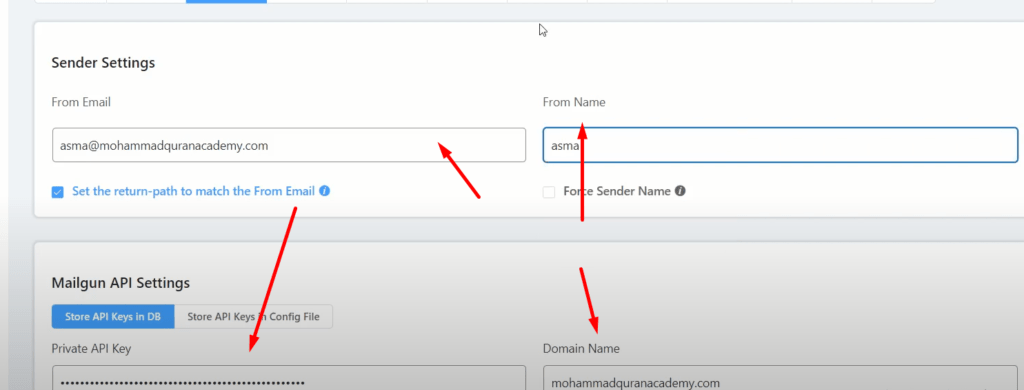
Note: The From Email should belong to the domain you verified above and From Name can be anything.
After adding all details just click on the Save and you are ready to send your first test email.

To perform the Test just add all information and click on Send Test Email button.

If all is good you can see a successful message like this.

How does Fluent SMTP work?
Fluent SMTP behaves like the middle man among WordPress and Email Service Provider. Fluent SMTP associates your site to a provider rather than attempting to utilize WordPress and your hosting provider to send emails.
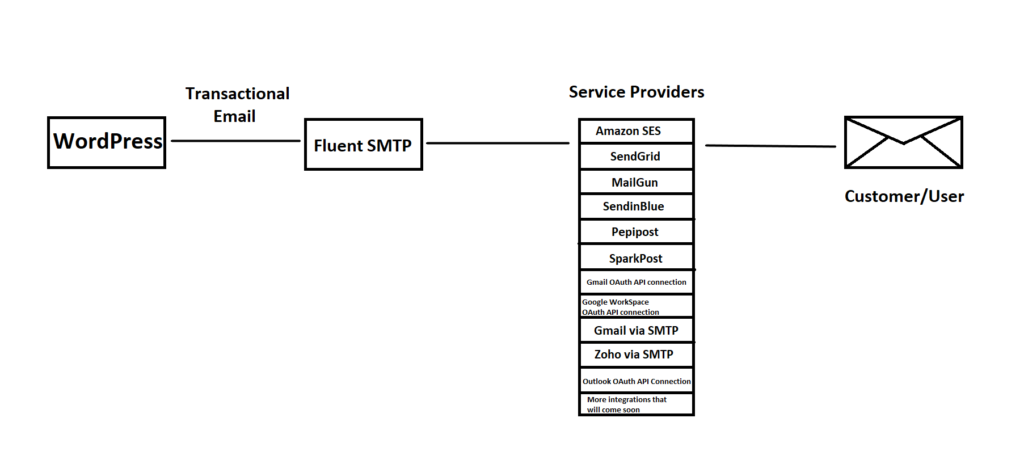
This is somewhat befuddling as individuals accept mistakenly that Fluent SMTP is the one sending the emails. It is really not the situation. It is just making a connection point for an email supplier like Amazon SES or SendinBlue to send emails for your site.
Conclusion
Fluent SMTP additionally incorporates a built-in email log where you can see which emails have been sent on the site and where it is being utilized.
The Fluent SMTP plugin provides a simple way for you to fix your site’s faulty email issue, including all features.
Read More: How to Configure Amazon SES in FluentSMTP for sending Emails


