Have you ever wondered what would happen if your WordPress website suddenly received a significant spike in traffic? Have you performed WordPress load testing for your site to ensure that it can withstand spikes in traffic, whether it is bot traffic or humans?
If one of your blog posts became viral and now you have 3000 visitors active on your site, can your WordPress site handle it?
Let’s test your website’s load capacity using Loader.io, and we’ll see how we can handle traffic spikes so that you don’t encounter problems.
Few Important Things Before You Start
Please note that when you perform loading testing using Loader.io, it will send huge amount of fake traffic, so make sure:
- Your server can take that traffic and your site don’t crash
- Some providers out there charge based on number of visitors, so make sure you don’t get a huge bill
How to WordPress Load Testing?
Finally its time we perform load testing for our WordPress website. We will be using loader.io because its free and really easy to use. With the free plan, you get the following:
- You can simulate up to 250 clients in the free plan
- 250 clients are spread over 1 minute duration
- Really intuitive and simple to use interface
- You don’t need to install anything as it is Cloud-based
- You can rerun your previous test simulations and watch the results
Step 1: Create an account on Loader.io
You need to create an account on Loader.io to perform the test, creating an account only requires a valid email address, click here to visit the registration page.
Step 2: Add and verify the Domain
Well, this is really important. You need to prove to Loader.io that you own the domain, this is good because otherwise anyone with Loader.io account can perform stress tests on any domain causing trouble for others user acquisition.
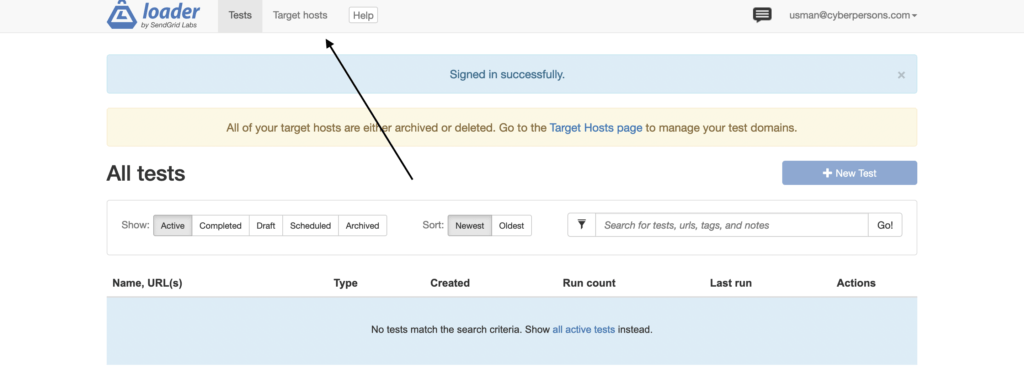
Click Target Hosts from top
Click New Host to add a new domain

Enter the domain you want to perform tests on and click Next: Verify

Now this is important step. Loader.io usually gives you two ways to verify your domain:
- DNS verification
- Or by dowloading and uploading a file to your server
We will going with second method. Once you click Next: Verify, loader.io will allow you to download a file that you can upload to your website document root.
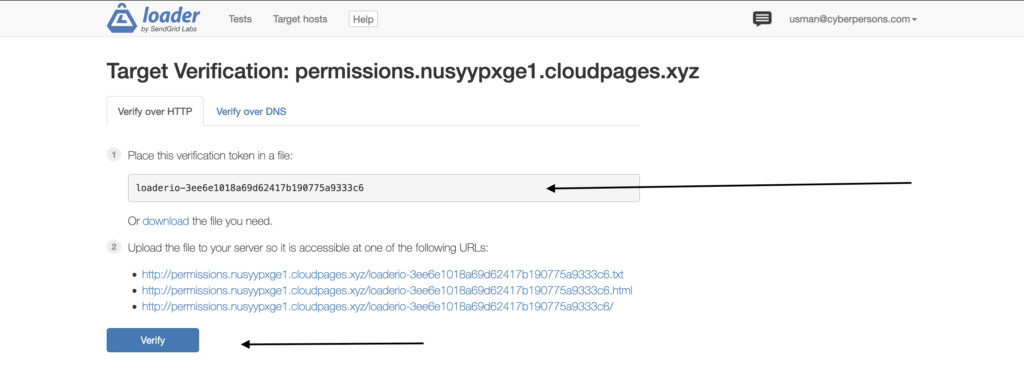
Now go to your web hosting control panel and upload this file to public_html or document root of your WordPress website. However let see how we can create this file in CloudPages
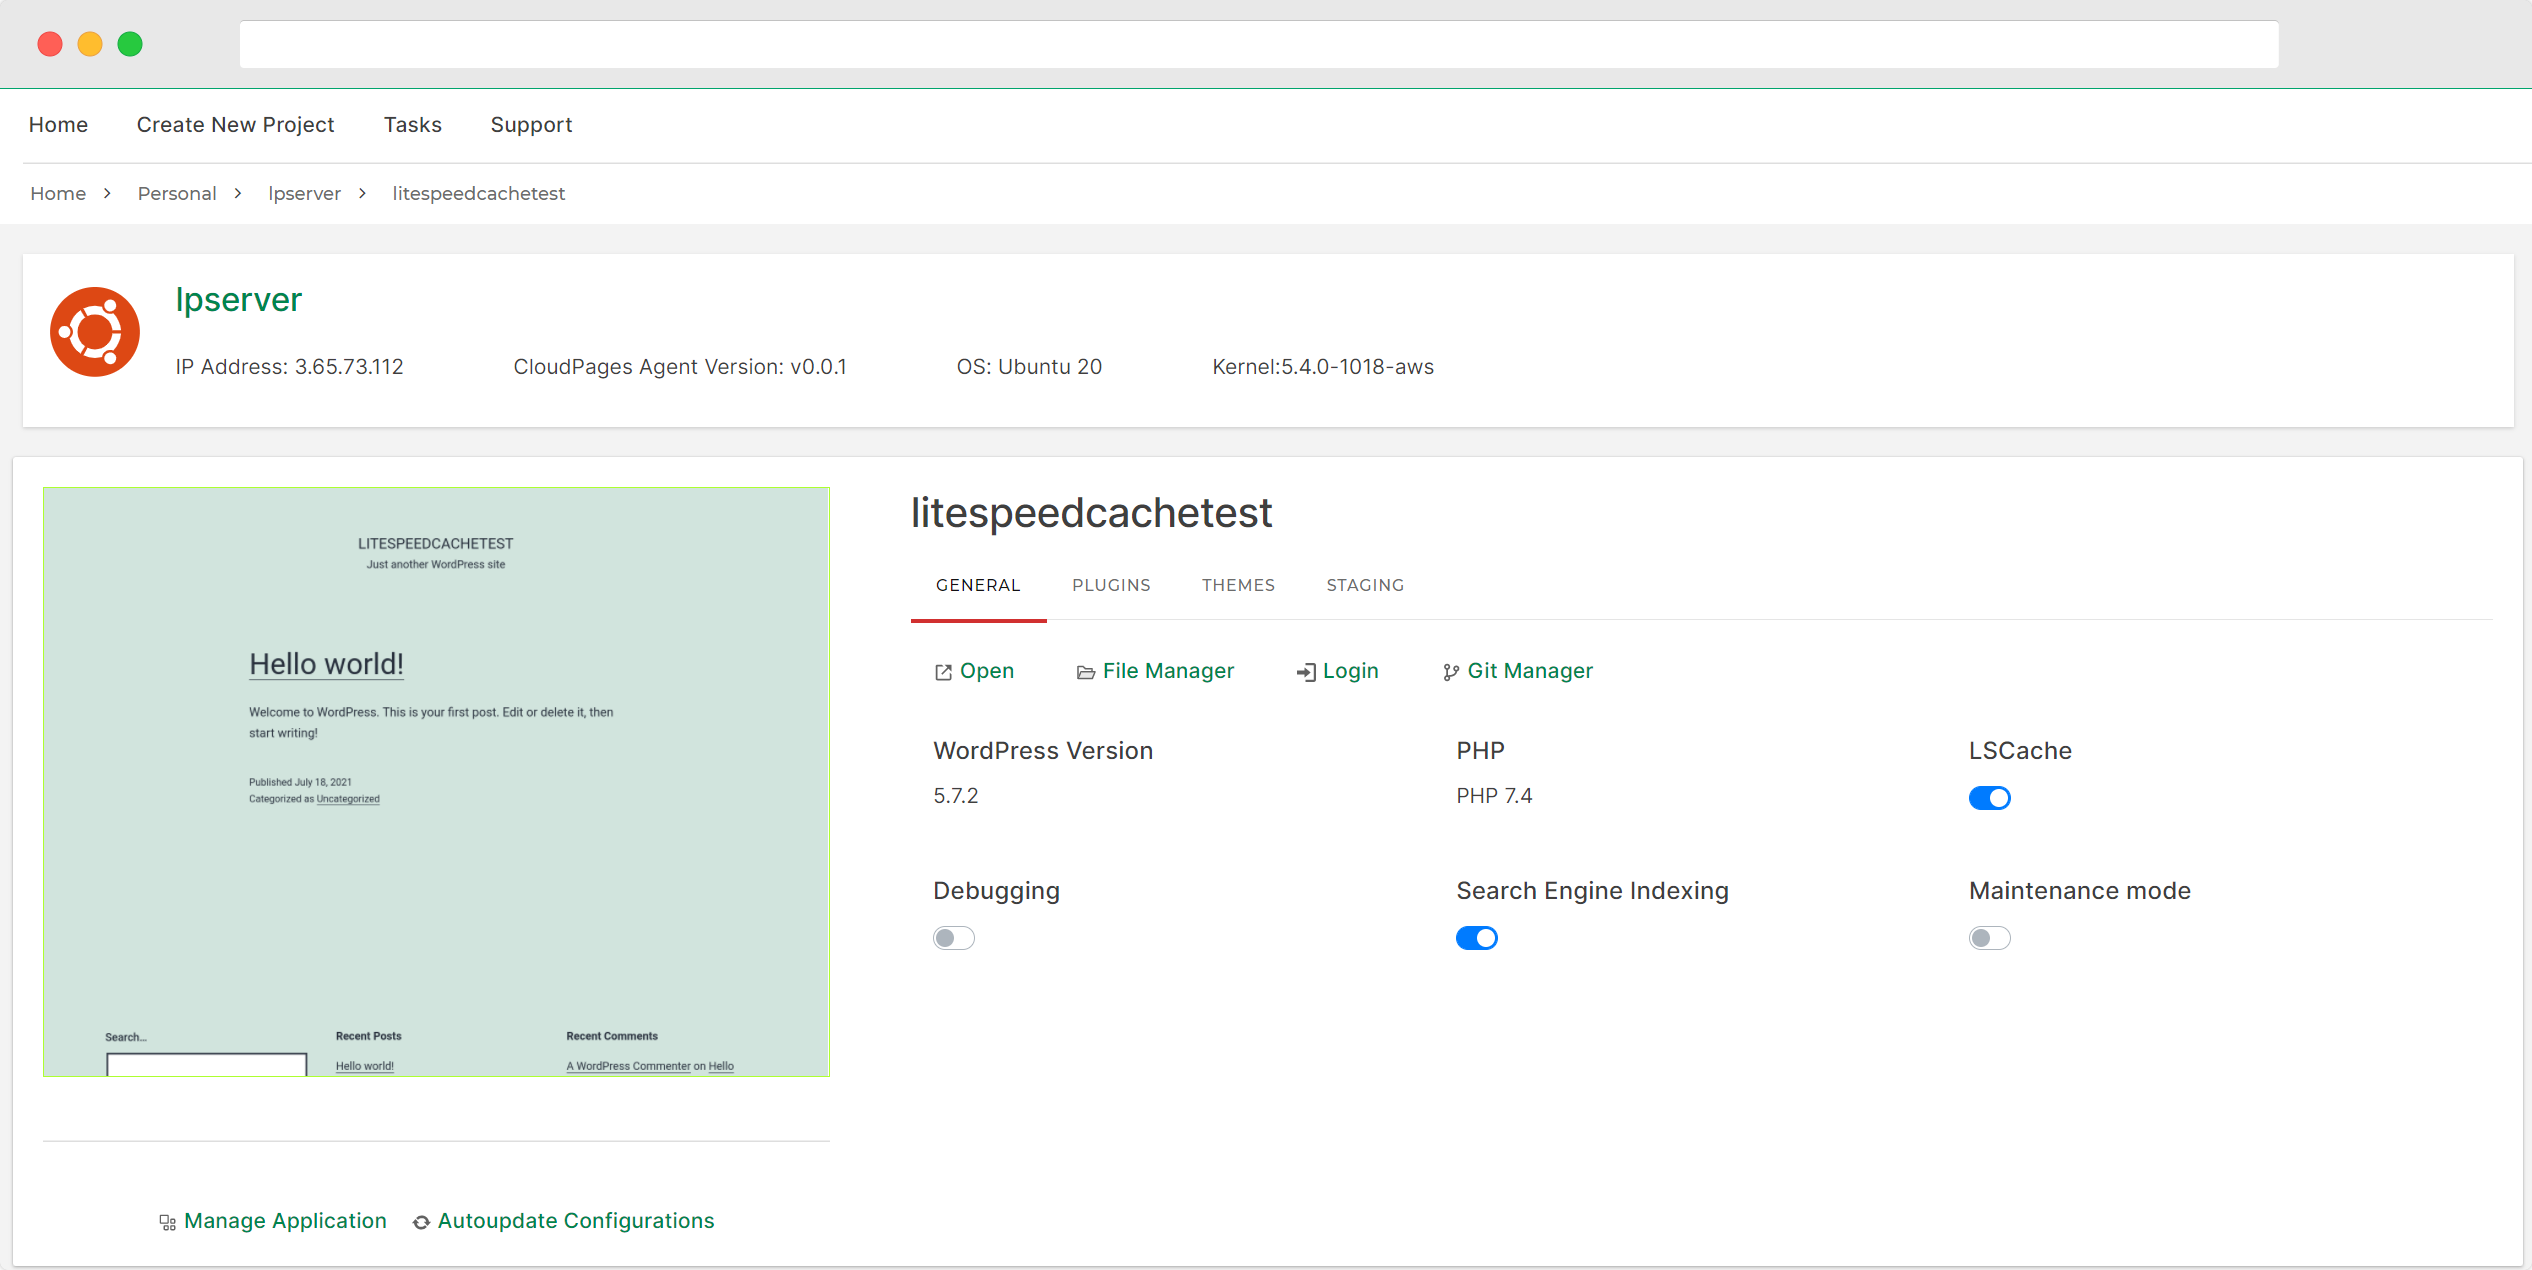
1. Login to CloudPages dashboard and you will see something like this:

2. Once you click the project, you will see something like:

3. Clicking on “List Servers” will take you to the list of servers, which will look like:

4. You will now land on your server dashboard, from where you will go to your WordPress site
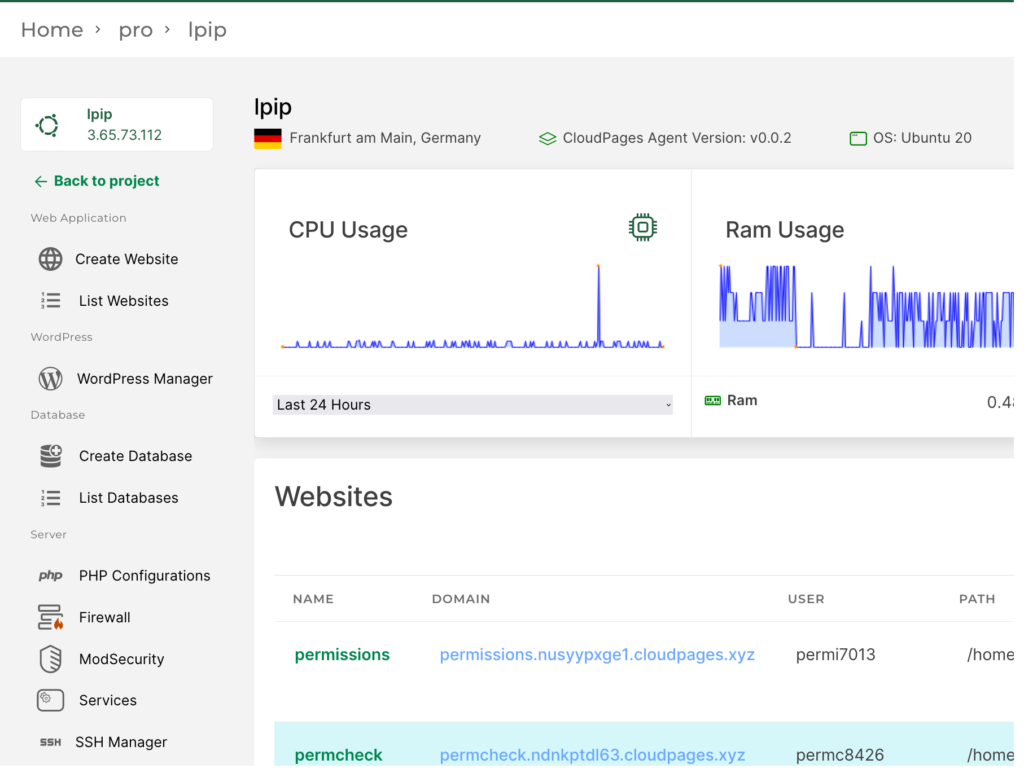
5. From the list of WordPress sites, click on the site you want to disable WP Cron for
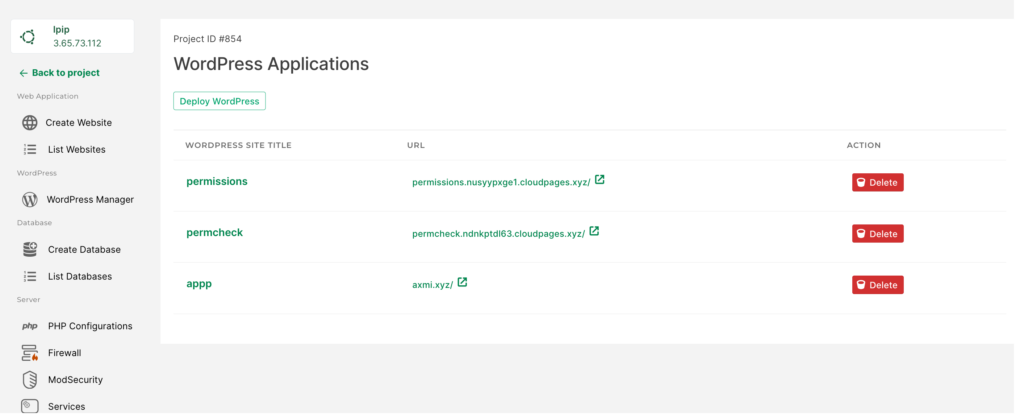
6. Once you are in WordPress Manager of your site, click File Manager
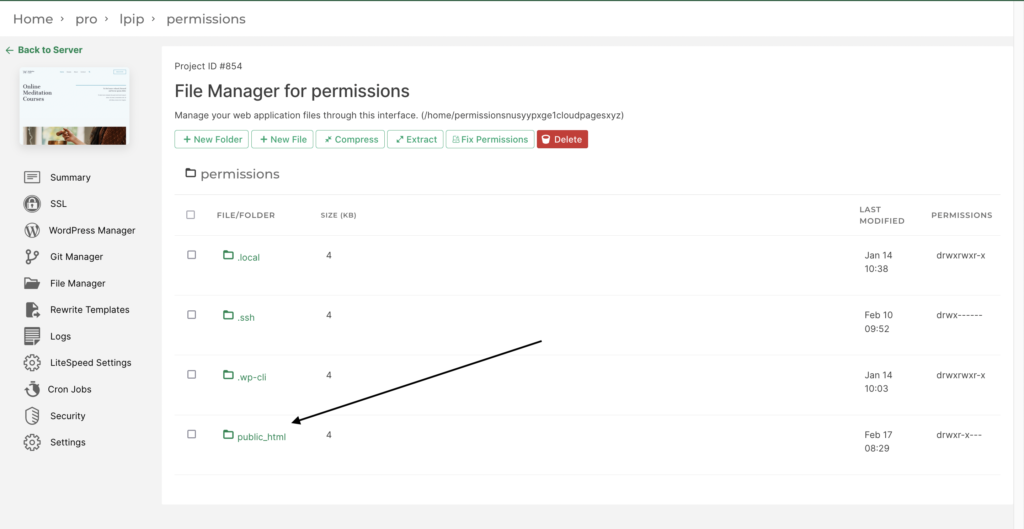
7. Finally you are in File Manager of your WordPress site, click public_html
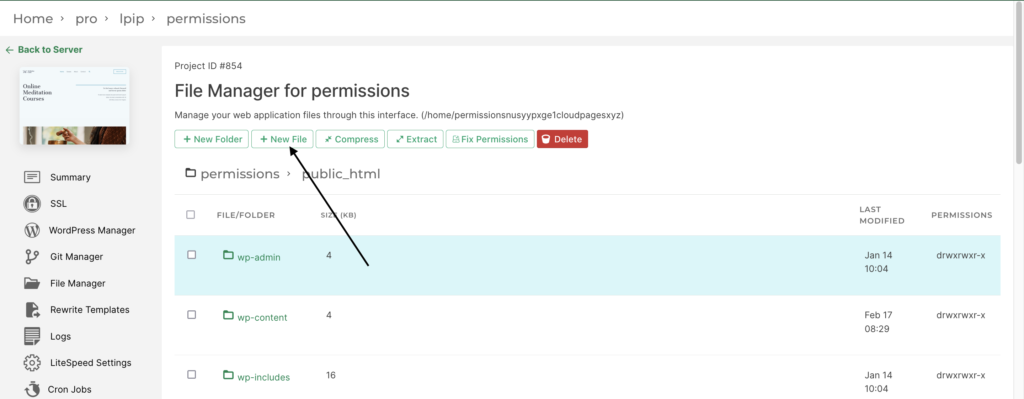
8. Inside public_html click New File
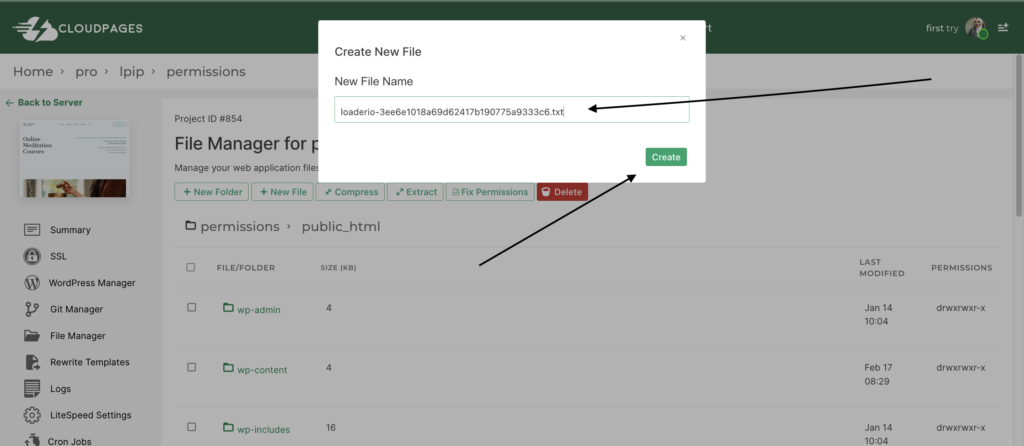
9. Your file name should be the one given by loader.io and at the end make sure to add txt.
10. Now open this by clicking on it
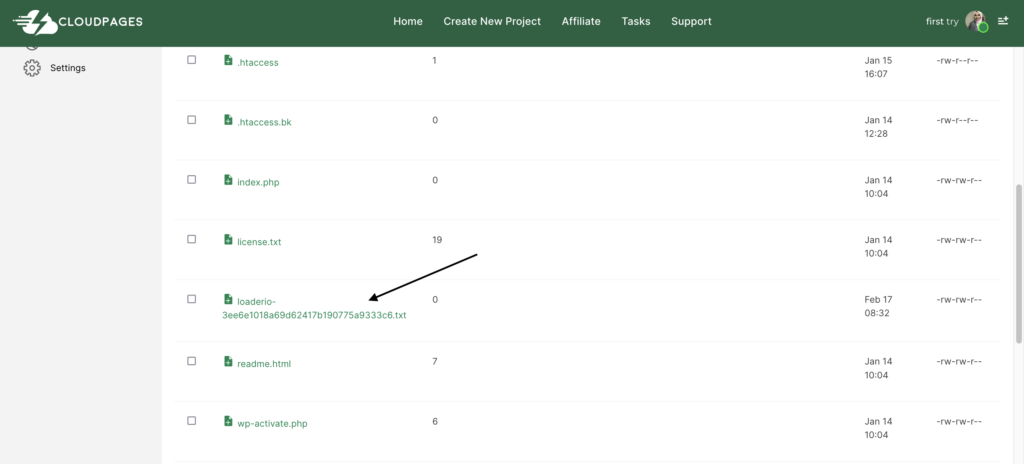
11. Paste the token that you got from loader.io and click Save Changes
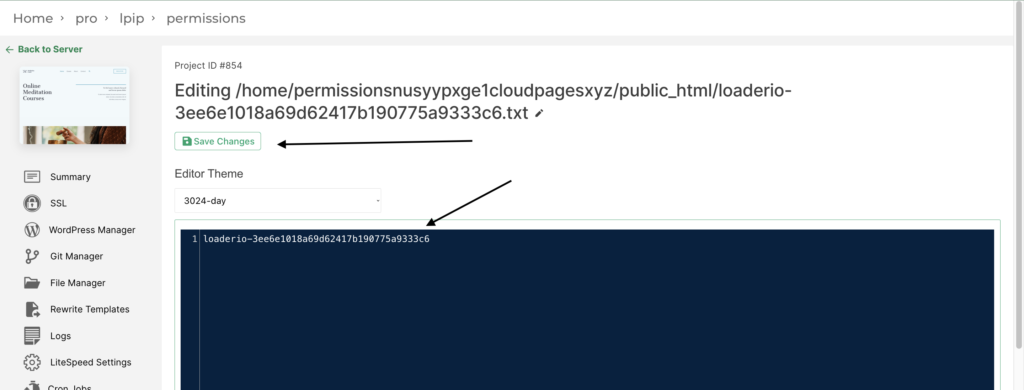
Once all of this is done go back to loader.io and click verify. Finally your domain is verified and you can now run a test on this domain.
Step 3: Run your test
Once your domain is added and successfully verified you can finally perform a test. Click on New Test (This window will appear after you perform your verification above)
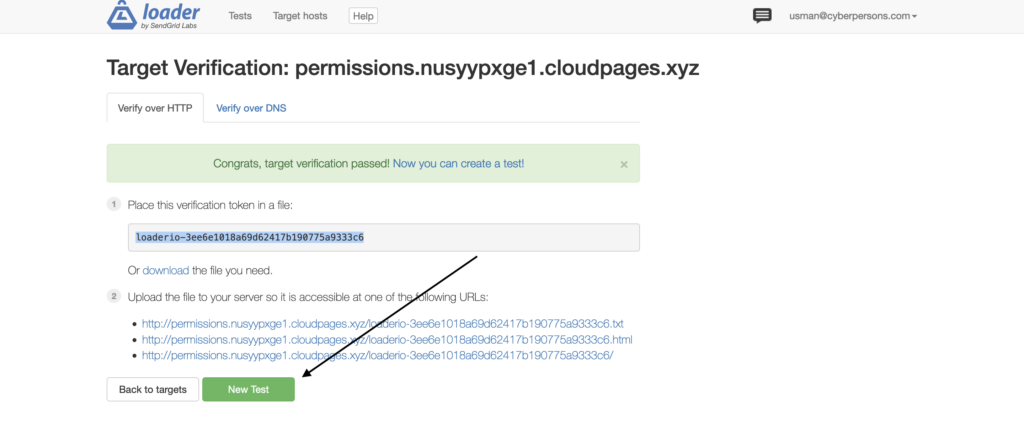
Enter following details on your test configuration window
- Test Name
- Make sure to choose HTTPs
- Finally click Run Test
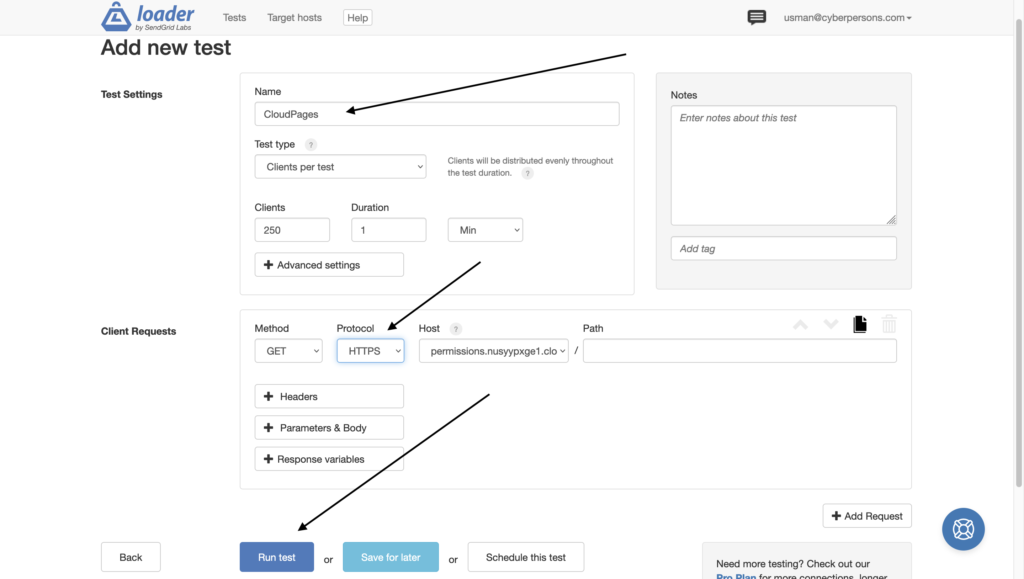
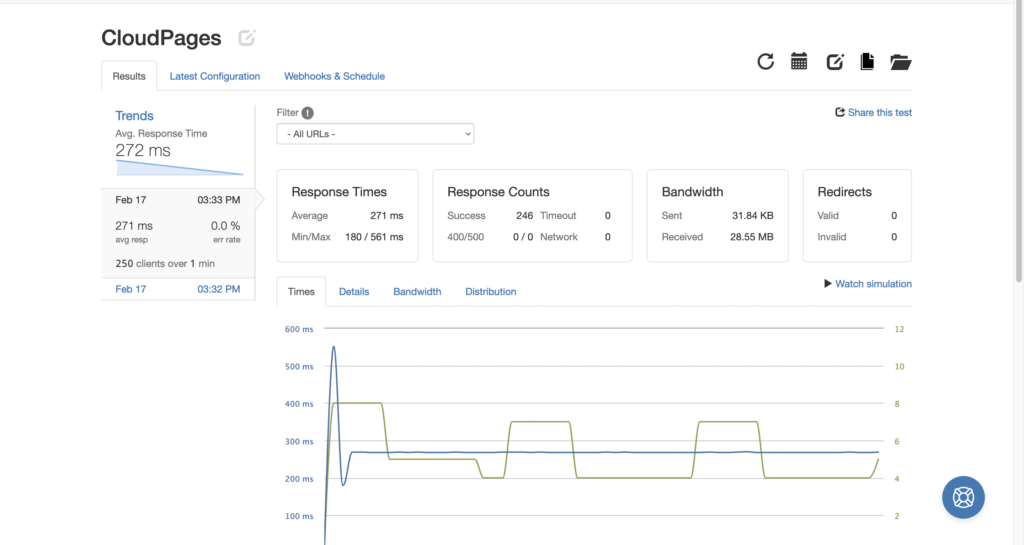
Loader.io will take roughly 1 minute to run the tests and provide you with results
LSCache to handle traffic spikes
Now that you have results of your testing, you might be wondering how you can sustain unexpected huge traffic spikes? Well you can use caching plugins and LiteSpeed Cache WordPress plugin is really great in this regard.
LSCache helps reduce the load by performing full-page caching at server level which consumes way less resources. You can also learn our case study regarding lscache vs wp rocket.


