In this article, we will discuss how to use Cloudflare firewall Rules to protect your web application. Cloudflare has been protecting websites from DDoS attacks and providing performance improvements to websites for nearly a decade.
Now they are offering security features and tools to make your server and website more secure.
Table of Contents
What is Firewall?
A firewall is a network security device that monitors incoming and outgoing network traffic and allows or blocks data packets based on a set of security rules.
What Are Cloudflare Firewall Rules?
Cloudflare Firewall Rules are a great way to filter HTTP requests. Cloudflare inspects and filters HTTP requests. This firewall is a powerful tool for blocking hackers. It’s also very popular with the security industry because it’s fast and flexible.
Firewall Rules are completely integrated with existing Cloudflare tools. Firewall Rules allow users to create rules that inspect incoming traffic and block, challenge, log, or allow specific requests. It gives you complete control of which requests can reach your web application thus giving you complete peace of mind.
Cloudflare Firewall Rules
Cloudflare Firewall Rules offer power and flexibility by inspecting HTTP traffic and applying custom criteria to block, challenge, log, or allow certain requests.
Cloudflare Firewall Rules are made up of two main functionalities:
- Matching
- Actions
Matching
Matching lets you define a filter to precisely match your traffic. It lets you filter out any kind of traffic to your website. You can block certain countries, redirect visitors to a location-specific page, or filter out particular IP addresses.
Actions
Actions tell Cloudflare how to handle HTTP requests that have matched a firewall rule expression and tell Cloudflare what to do when the certain filter is triggered.
Various examples of how you can use Cloudflare Firewall Rules
Let’s discuss some basic examples of how you can use Cloudflare rules and protect your website against online attacks.
- Secure your WordPress site with captcha
- Block Access to XMLRPC.php
- How to block particular countries from visiting your site
- How to prevent bad bot traffic from coming to your site
- How to block a particular continent from visiting your site
- Show a captcha message on any page
- Protect WordPress Admin (wp-admin) area
How to access Firewall Feature in Cloudflare
Before moving forward, let see how you can reach the Firewall option inside Cloudflare.
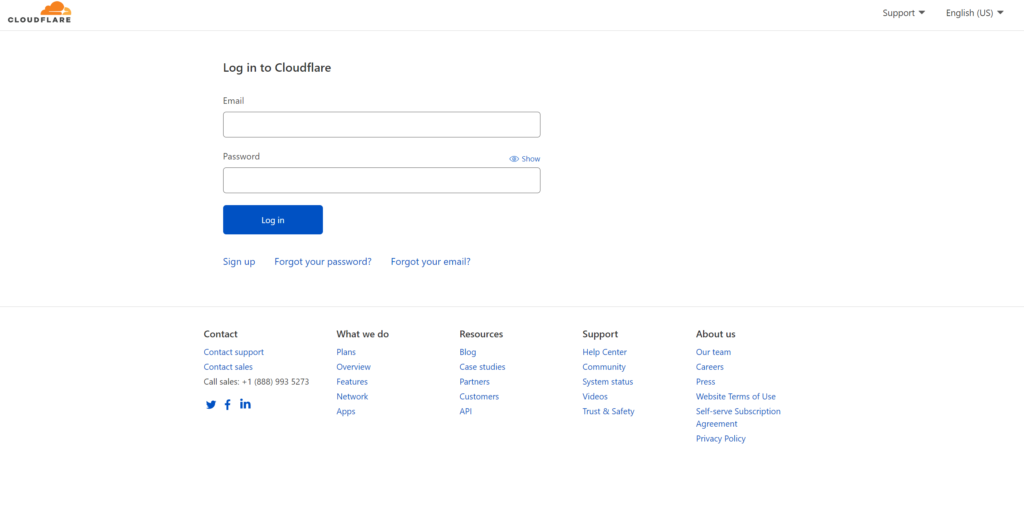
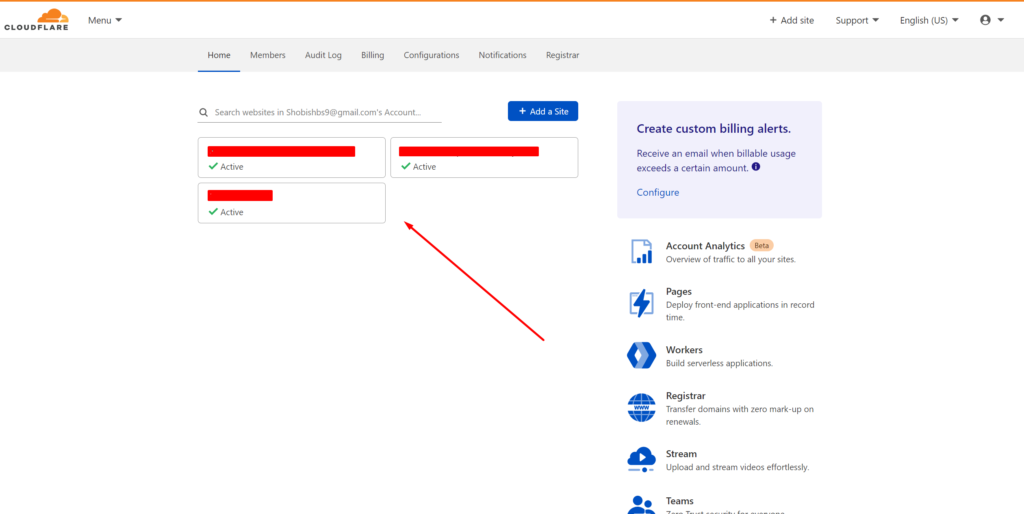
You have to log in to your Cloudflare account and select the domain for which you want to enable these rules. Once logged in we can proceed further.
Click here and provide your credentials to log in.
You can see this dashboard after login, from this window select the domain (this window design may slightly change later)
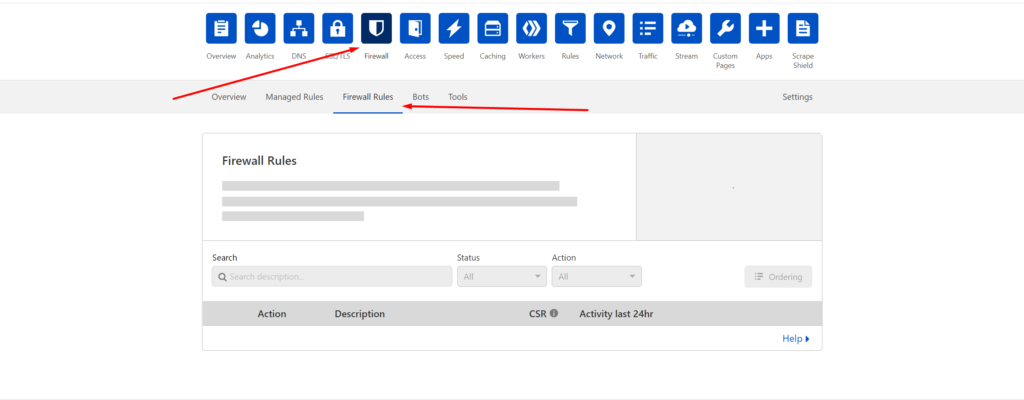
Now from the top bar, click on the Firewall button and then on Firewall Rules.
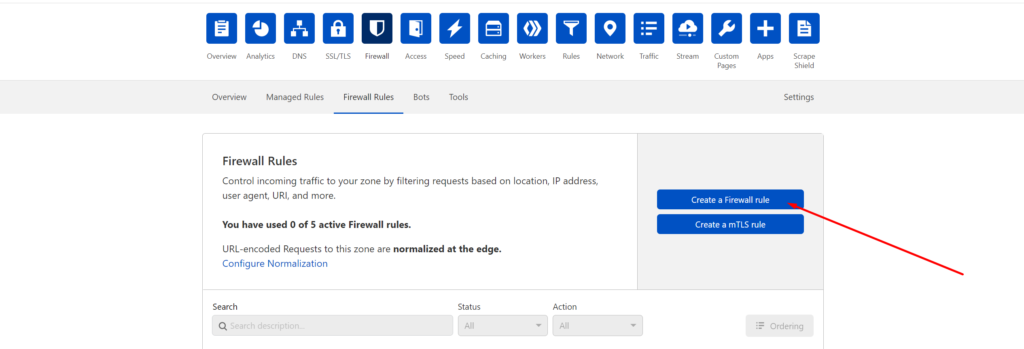
Here on this screen, we have a Create a Firewall Rule button. Click on this and you can add a new firewall rule, view any rule, activate any rule, deactivate any rule, update any rule and delete any firewall rule.
Note: Cloudflare also offers Manager Rules, these rules are created and managed by the Cloudflare team but they are not available on the Free plan, so if you don’t have much time, you can upgrade your plan and use Cloudflare managed Firewall Rules.
We will now discuss some examples of how we can create basic rules and secure our websites.
Secure your WordPress site with a Captcha
The Captcha test is one way to distinguish human from machine/robots input.
Now we will see how to secure your WordPress site with a rule to add captcha infront of your site,
If you have followed the procedure above, you will be on Create Firewall Rule window now click on the Edit expression.
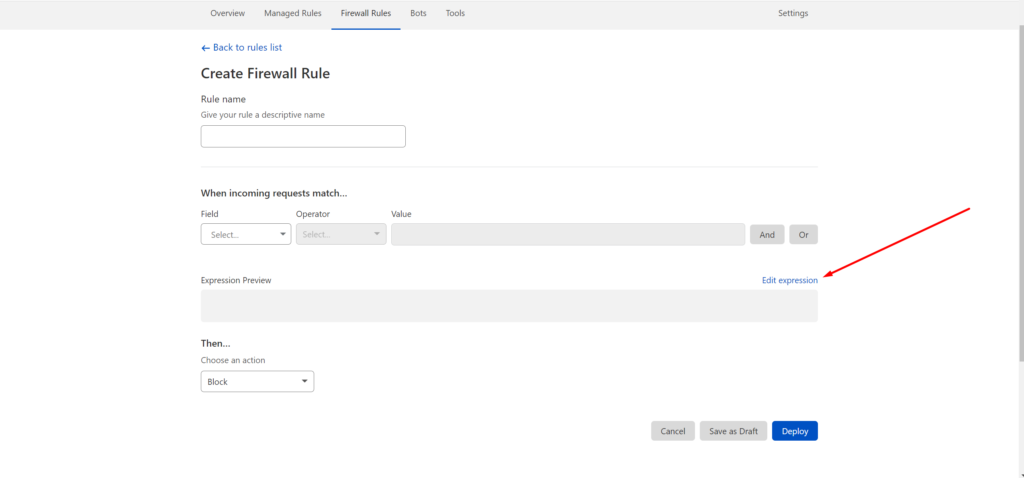
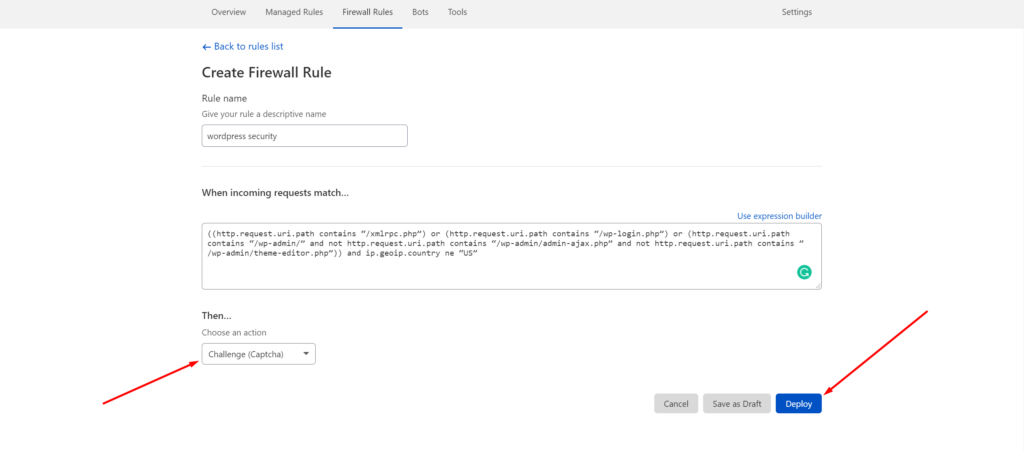
You can see the editor screen. In the Expression Editor field paste the following:
((http.request.uri.path contains “/xmlrpc.php”) or (http.request.uri.path contains “/wp-login.php”) or (http.request.uri.path contains “/wp-admin/” and not http.request.uri.path contains “/wp-admin/admin-ajax.php” and not http.request.uri.path contains ” /wp-admin/theme-editor.php”)) and ip.geoip.country ne “US”After that, From the drop-down action select Challenge (captcha) to enable captcha on your WordPress site and press Deploy.
Block access to XMLRPC.php
XMLRPC is part of the old WordPress API and is not being actively used these days.
If you never publish from anywhere but directly in the WordPress admin, you are fine to disable XML-RPC. You can learn more about this here.
Note: The above rule will also take care of disabling access to XMLRPC.php but if you don’t want to use captcha, you can create this rule individually to block access to XMLRPC.php.
If you have followed the procedure above, you will be on Create Firewall Rule window now click on the Edit expression.

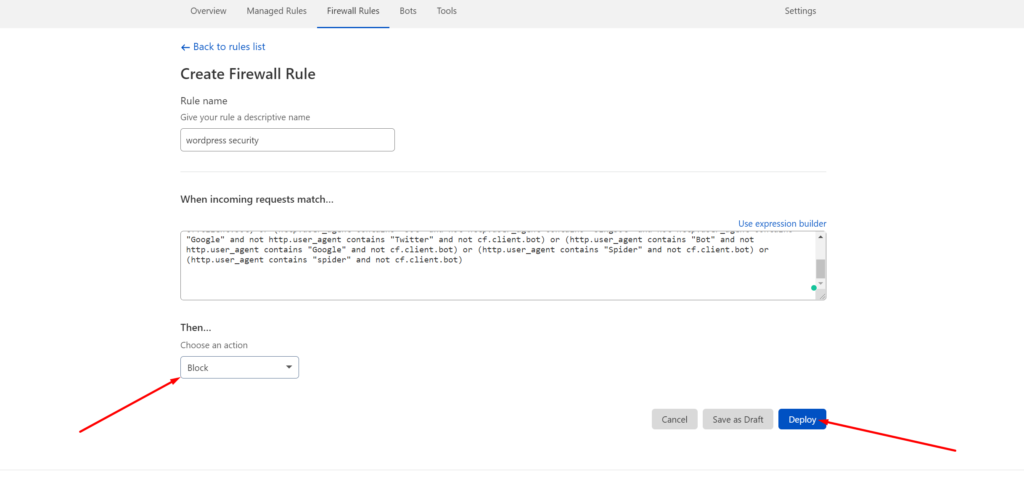
You can see the editor screen. In the Expression Editor field paste the following:
(http.request.uri.path contains “/xmlrpc.php”)This time you should choose Block from the Choose an action drop-down and click on the Deploy button.
How to block particular countries from visiting your site
You can block one country or many as you want. You can also allow access to your website to only one country. As an example In this article, I will block all countries except Canada).
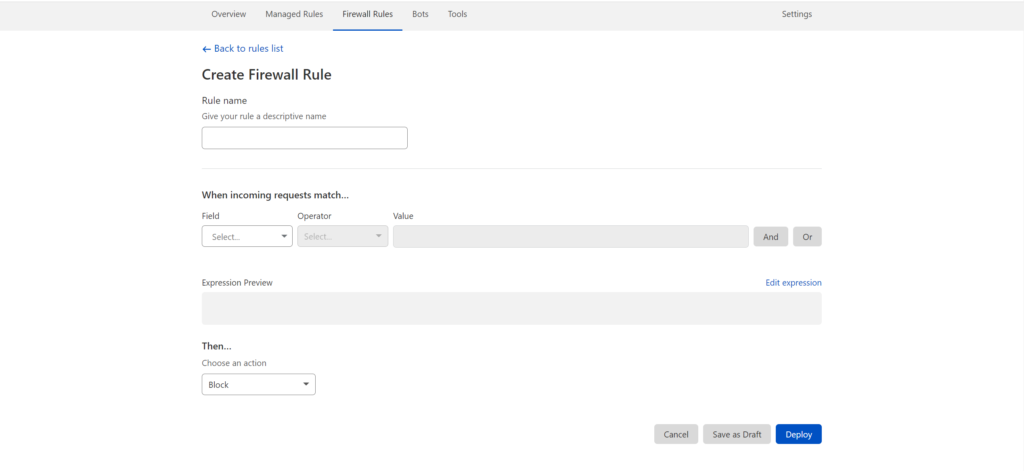
We need the following information to provide in order to apply this feature.
- Rule Name: Enter rule name according to your choice.
- Field: From the drop-down, choose Country.
- Operator: From the drop-down, choose does not equal.
- Value: From the drop-down, choose Canada.
- In the last section from action drop-down, select Block, and then click on the blue Deploy button.
How to prevent bad bot traffic from coming to your site
Bad bots are malicious software programs that perform a number of fraudulent practices. For example, they might run online ad scams, download malware onto your computer, or steal your credit card information. About 40% of internet traffic is generated by bad bots.
Now we will see how to block bad bot traffic from coming to your site
If you have followed the procedure above, you will be on Create Firewall Rule window now click on the Edit expression.

You can see the editor screen. In the Expression Editor field paste the following:
(http.user_agent contains "Yandex") or (http.user_agent contains "muckrack") or (http.user_agent contains "Qwantify") or (http.user_agent contains "Sogou") or (http.user_agent contains "BUbiNG") or (http.user_agent contains "knowledge") or (http.user_agent contains "CFNetwork") or (http.user_agent contains "Scrapy") or (http.user_agent contains "SemrushBot") or (http.user_agent contains "AhrefsBot") or (http.user_agent contains "Baiduspider") or (http.user_agent contains "python-requests") or (http.user_agent contains "crawl" and not cf.client.bot) or (http.user_agent contains "Crawl" and not cf.client.bot) or (http.user_agent contains "bot" and not http.user_agent contains "bingbot" and not http.user_agent contains "Google" and not http.user_agent contains "Twitter" and not cf.client.bot) or (http.user_agent contains "Bot" and not http.user_agent contains "Google" and not cf.client.bot) or (http.user_agent contains "Spider" and not cf.client.bot) or (http.user_agent contains "spider" and not cf.client.bot)
This time you should choose Block from the Choose an action drop-down and click on the Deploy button.

Set Known Bots
When setting bot traffic using Cloudflare, be sure to consider known bots as well. Popular know bots are Ashraf (SEO Tool), apple, being, google, Linkedin, etc.
So make sure that you don’t block Known bots.
How to block a particular continent from visiting your site:
You can block continents from visiting your website. You can also allow access to your website to only one continent. As an example In this article, I blocked the Asian continent from visiting the site.
We need the following information to provide in order to apply this feature.
- Rule Name: Enter rule name accourding to your choice.
- Field: From drop-down, choose Continent.
- Operator : From drop-down, choose does not equal.
- Value: From drop-down, choose the Asia.
- In the last section from action drop-down, select Block, and then click on the blue Deploy button.

Show a captcha message on any page
Sometimes we need to secure and show captcha challenges on certain pages only and secure them from attackers and hackers.
Maybe we have hundreds of users on our website and we want that bots should not enter to a specific page or area. This will save the site from brute force attacks and decrease the load on the server.
- Rule Name: Enter rule name according to your choice.
- Field: From the drop-down, choose URI.
- Operator: From the drop-down, choose contain.
- Value: Add your page name.
- In the last section from the Action drop-down, select Challenge (capchta), and then click on the blue Deploy button.

This will reduce the number of brute force attacks and also decrease server load.
Protect WordPress Admin(wp-admin) Area:
When you are using WordPress CMS its admin dashboard is one of the most important and vulnerable areas and you need to work hard to secure it otherwise your site is at great risk. There are a lot of security plugins there securing the WordPress admin area but they usually slow down your website.
But Cloudflare made it easier to secure the WP-ADMIN area using Cloudflare firewall rules and also it does not put extra pressure on your server resources.
In the case of wp-admin, we have to block two types of access one for plugins and the other one for themes. The first one for plugins will be blocked here /wp-admin/admin-ajax.php and the second one for themes will be blocked here /wp-admin/theme-editor.php.
Have to create two rules for both and block those.
Rule 1:
- Rule Name: Enter rule name according to your choice.
- Field: From the drop-down, choose URI Path.
- Operator : From drop-down, choose contains:
- Value: Add /wp-admin/admin-ajax.php .
- In the last section from the action drop-down, select Block, and then click on the blue Deploy button.
Rule 2:
- Rule Name: Enter rule name according to your choice.
- Field: From the drop-down, choose URI Path.
- Operator : From drop-down, choose contains:
- Value: Add /wp-admin/theme-editor.php .
- In the last section from the action drop-down, select Block, and then click on the blue Deploy button.

Set Cloudflare Threat Score
This is also one of the firewall rule options from Cloudflare. it is a key option in the Cloudflare dashboard. You can set a Threat Score and they are described as:
- 0 indicates low risk as determined by Cloudflare.
- Values above 10 may represent spammers or bots.
- Values above 40 point to bad actors on the Internet.
- It is rare to see values above 60, so tune your firewall rules to challenge those above 10, and to block those above 50.
Once their score is enabled on your website you can protect your website more. You can read more about Cloudflare Threat Scores and Understanding the Cloudflare Security Level here.
Importance of Firewalls on Your Website?
Cloudflare protects your website from threats and attacks using firewall rules. This helps protect you from hackers. Around 70% of WordPress websites are vulnerable to hackers, so Cloudflare is really important to keep your site safe.
Cloudflare is good at keeping your site safe. It makes it more secure with the firewall and helps make it faster by doing different things like minifying which means taking out what you don’t need so the site can load quicker.
Cloudflare stops people from attacking your website. Cloudflare has a “save under attack mode” that saves your website from attacks. You can also use Cloudflare’s rate-limiting function to help you if someone is trying to hack into your website. Cloudflare has a “rate-limiting” function which allows
These facts also help to improve the ranking, SEO, Speed, and image of your product.


